
Knowledge Base
 WordPress
How to Export WooCommerce Products
WordPress
How to Export WooCommerce Products
How to Export WooCommerce Products
WooCommerce is the most used open-source eCommerce solution, with over 5 million active users and more than 200 million downloads to date. It’s also one of the must-have WordPress plugins. ✅
With all of its fantastic store features and functionalities, this WordPress plugin is free. And it’s a good choice because you can set up your WooCommerce store in minutes, even if you’re a beginner with no experience with websites. But we’ll leave the set up of the new store for another time. Here, we’ll go over the process of exporting Products in WooCommerce. Every step of the process will be illustrated with pictures and videos.
There are numerous reasons why you need to export your website’s products. For example, you may need to migrate your website, update your products, or send your product data to a warehouse. In some cases, you can manually update your store’s products if it only has a handful of them. However, if you own a webstore, you will most likely have a lot of products, and exporting products in bulk can be very useful.
There are two methods for exporting products from your WooCommerce store. One is directly from the WordPress menu, and the other is via a plugin. And now it’s time to go over these two methods and finally learn how to export products in WooCommerce.
Exporting WooCommerce Products Without a Plugin
If you have WooCommerce 3.1.x or later, you can export your product data directly from the built-in product CSV exporter without using any plugins.
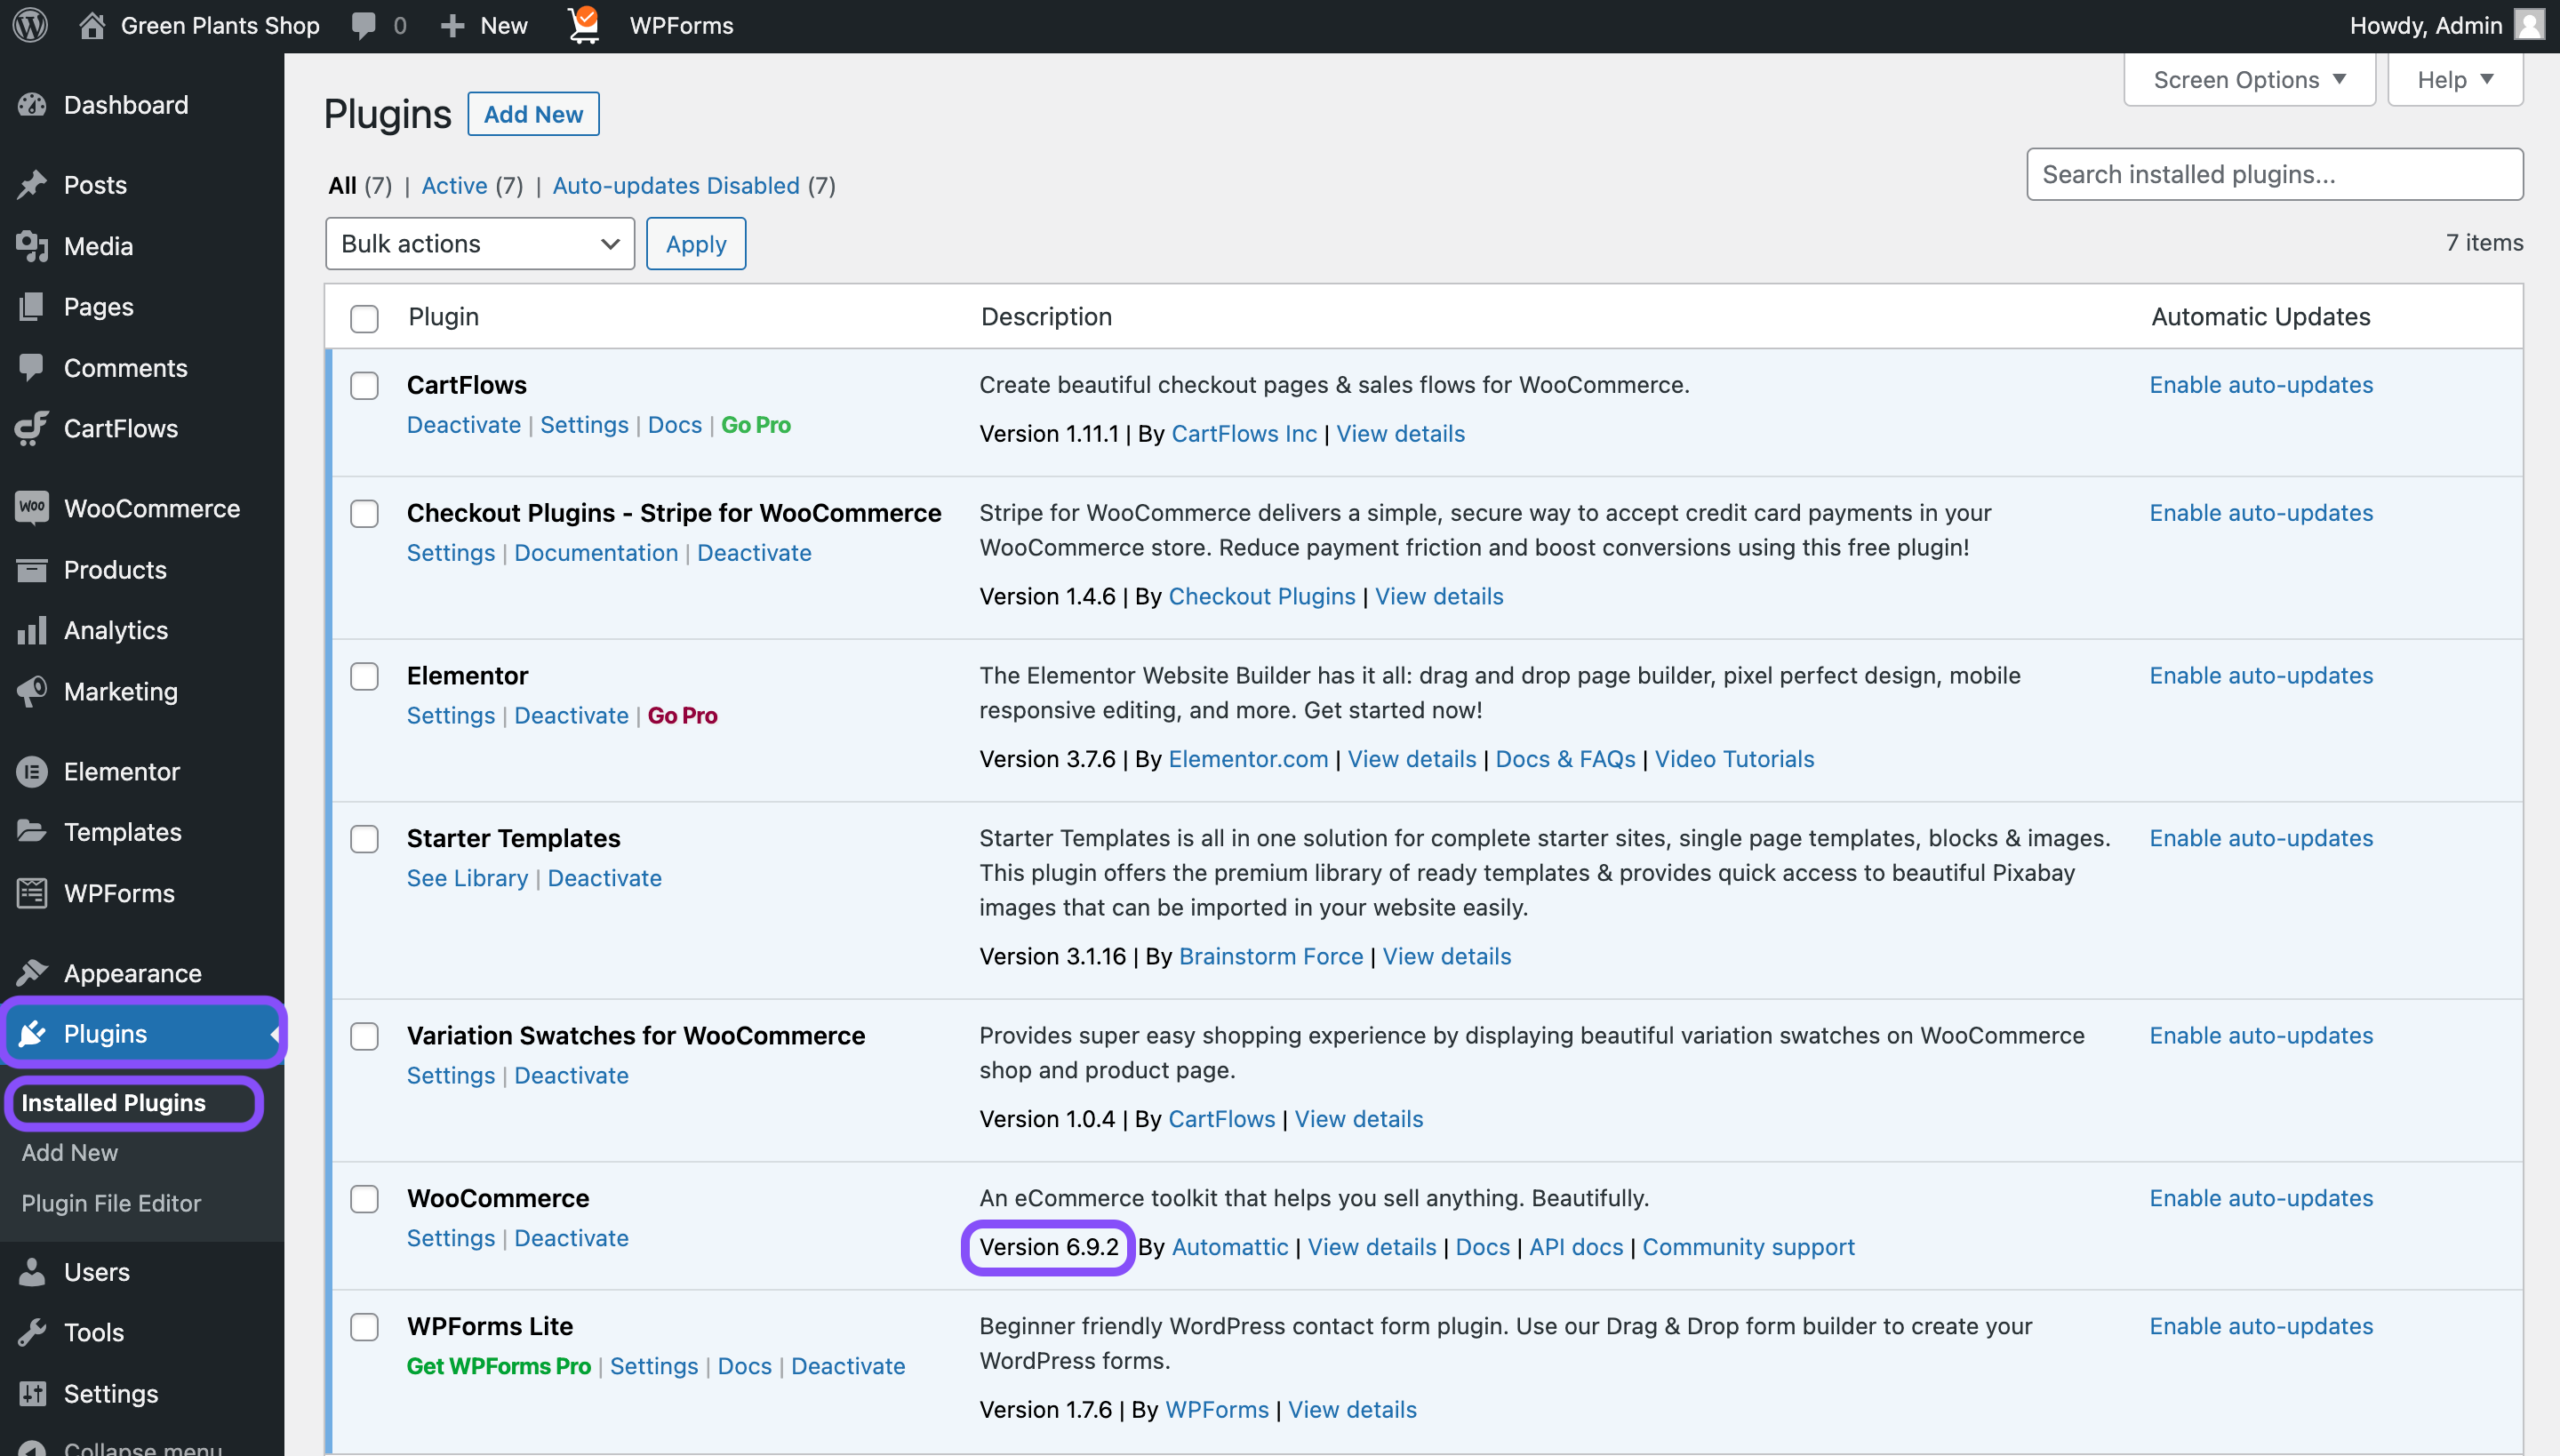
I recently upgraded my WooCommerce plugin, and I’m using version 6.9.2 for this guide. If you want to check your WooCommerce version, choose Plugins from your WordPress Dashboard. On the right, you’ll see a list of all the plugins you’re using for the current website along with their versions, as shown in the image below.
Now let’s go over the step-by-step guide for exporting Products 👇
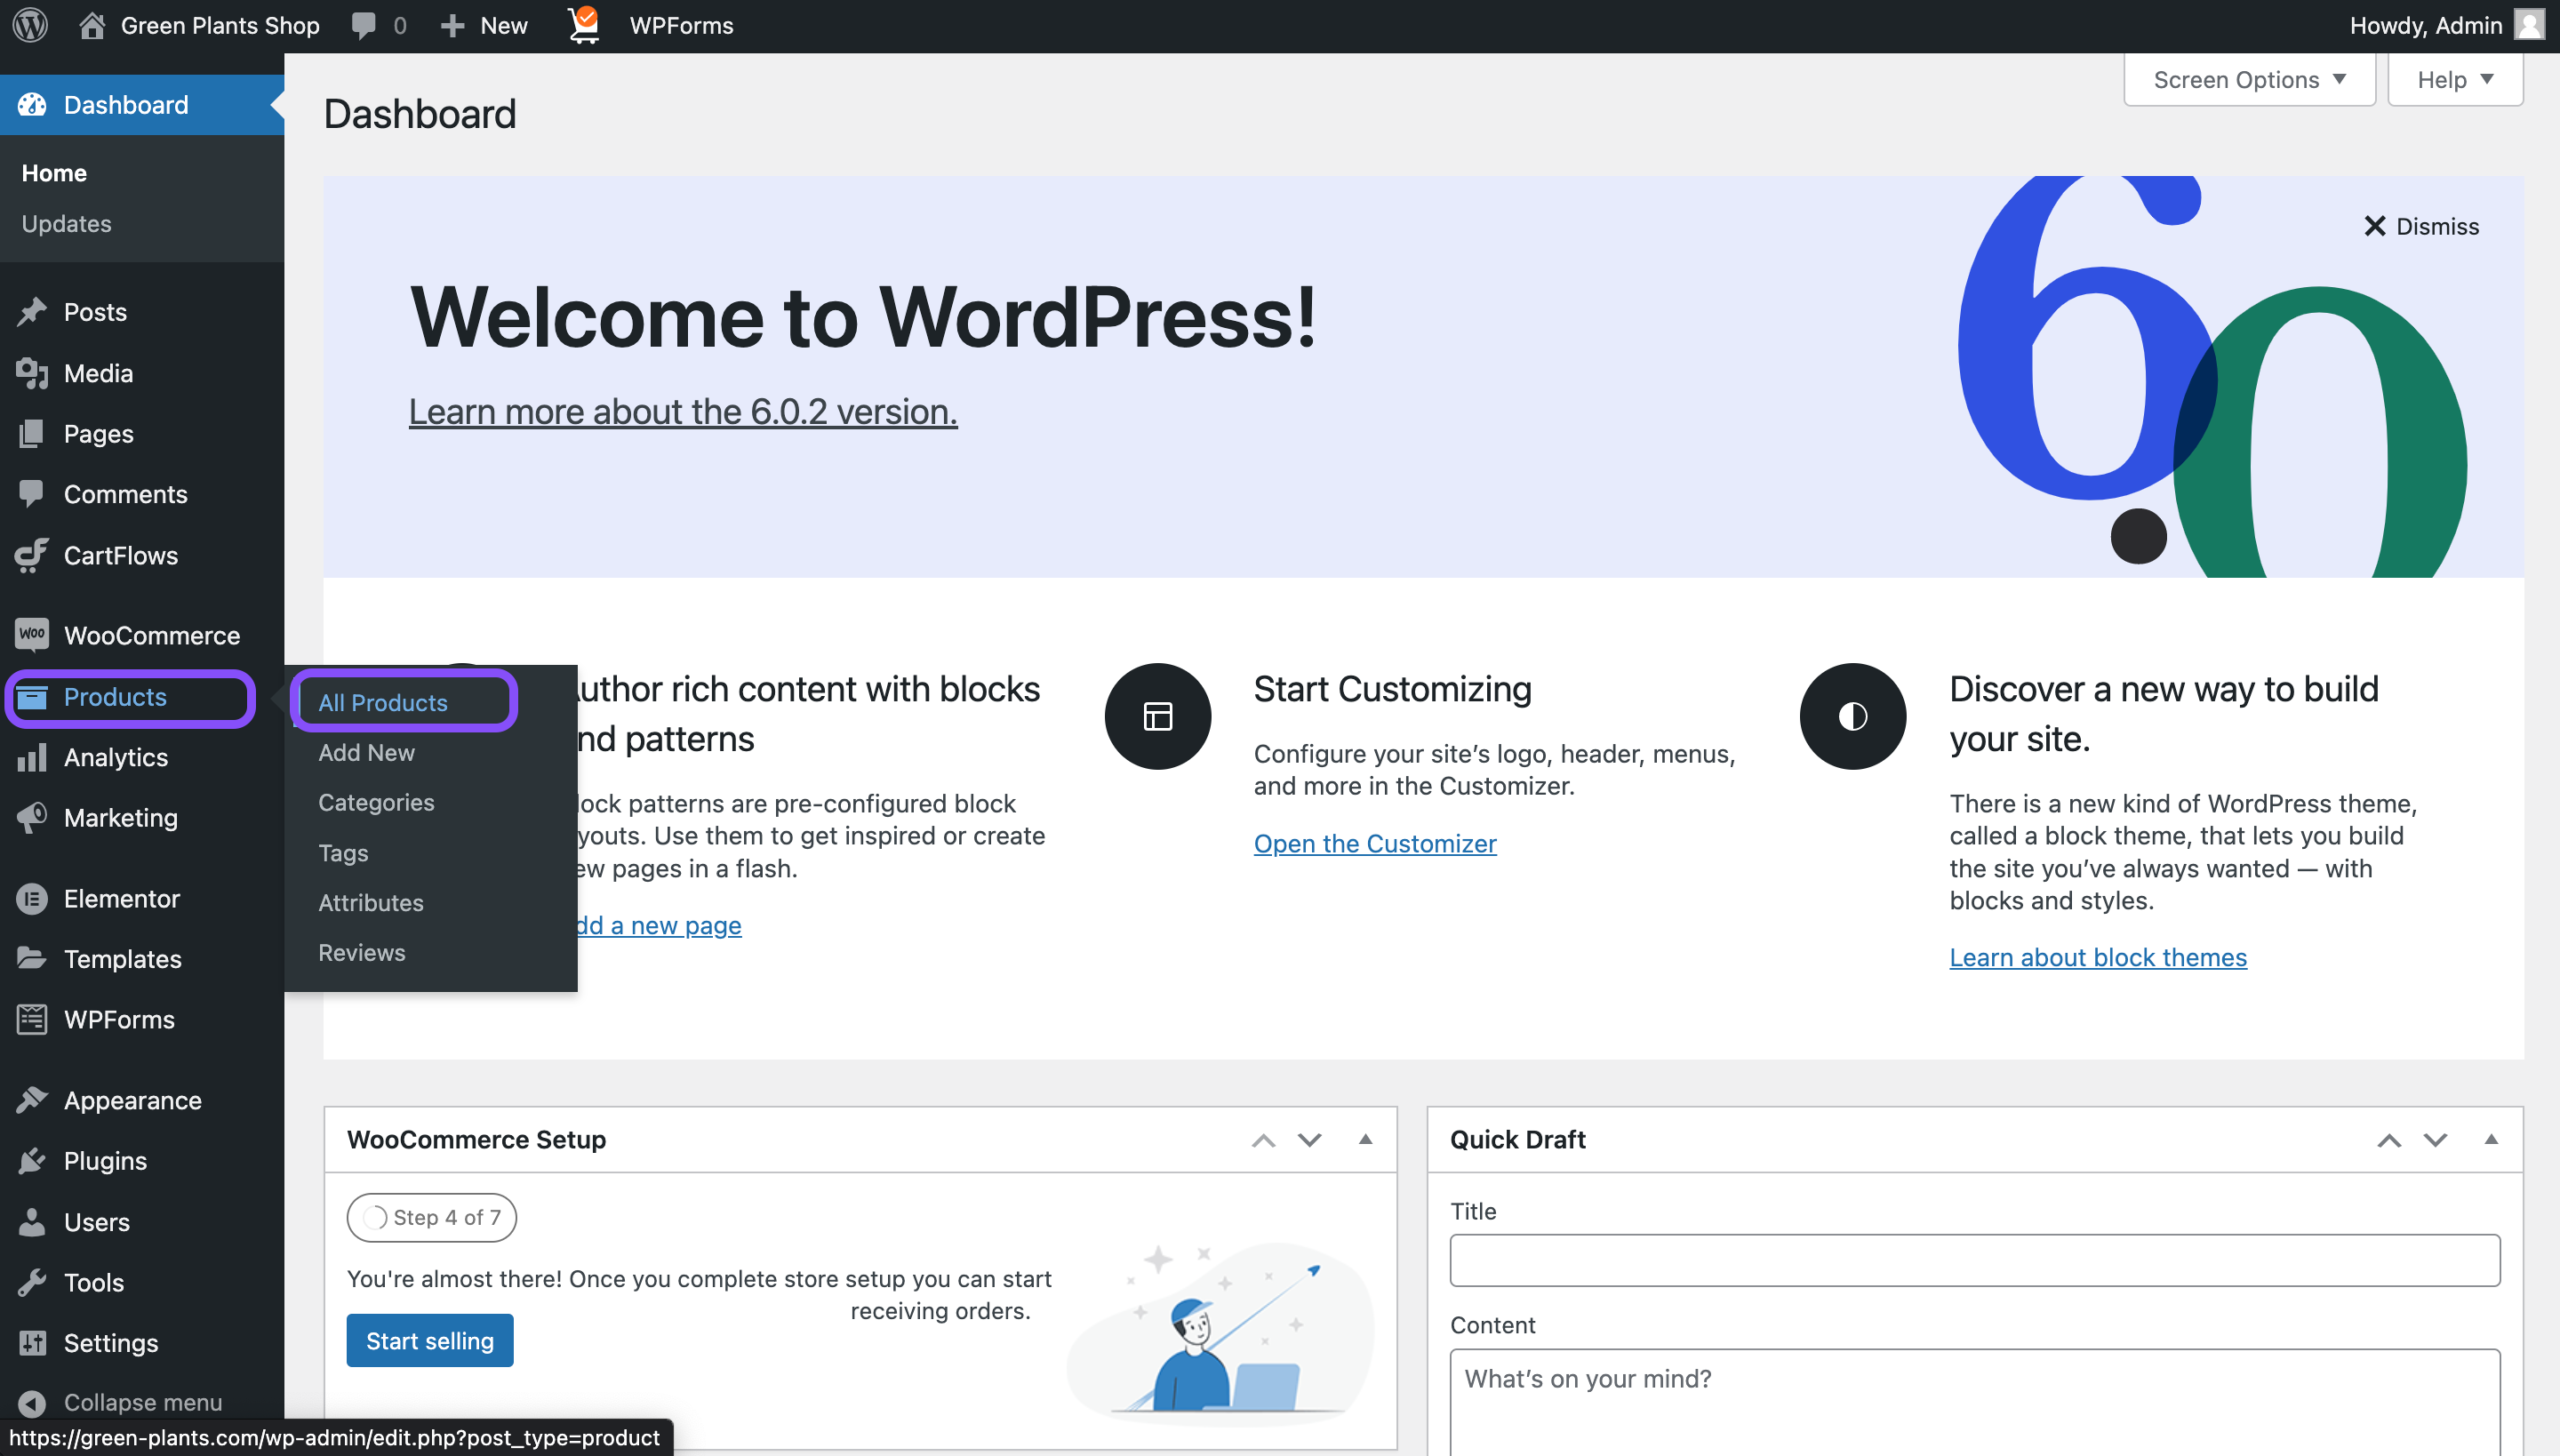
Step 1: Go to Products ➛ All Products.
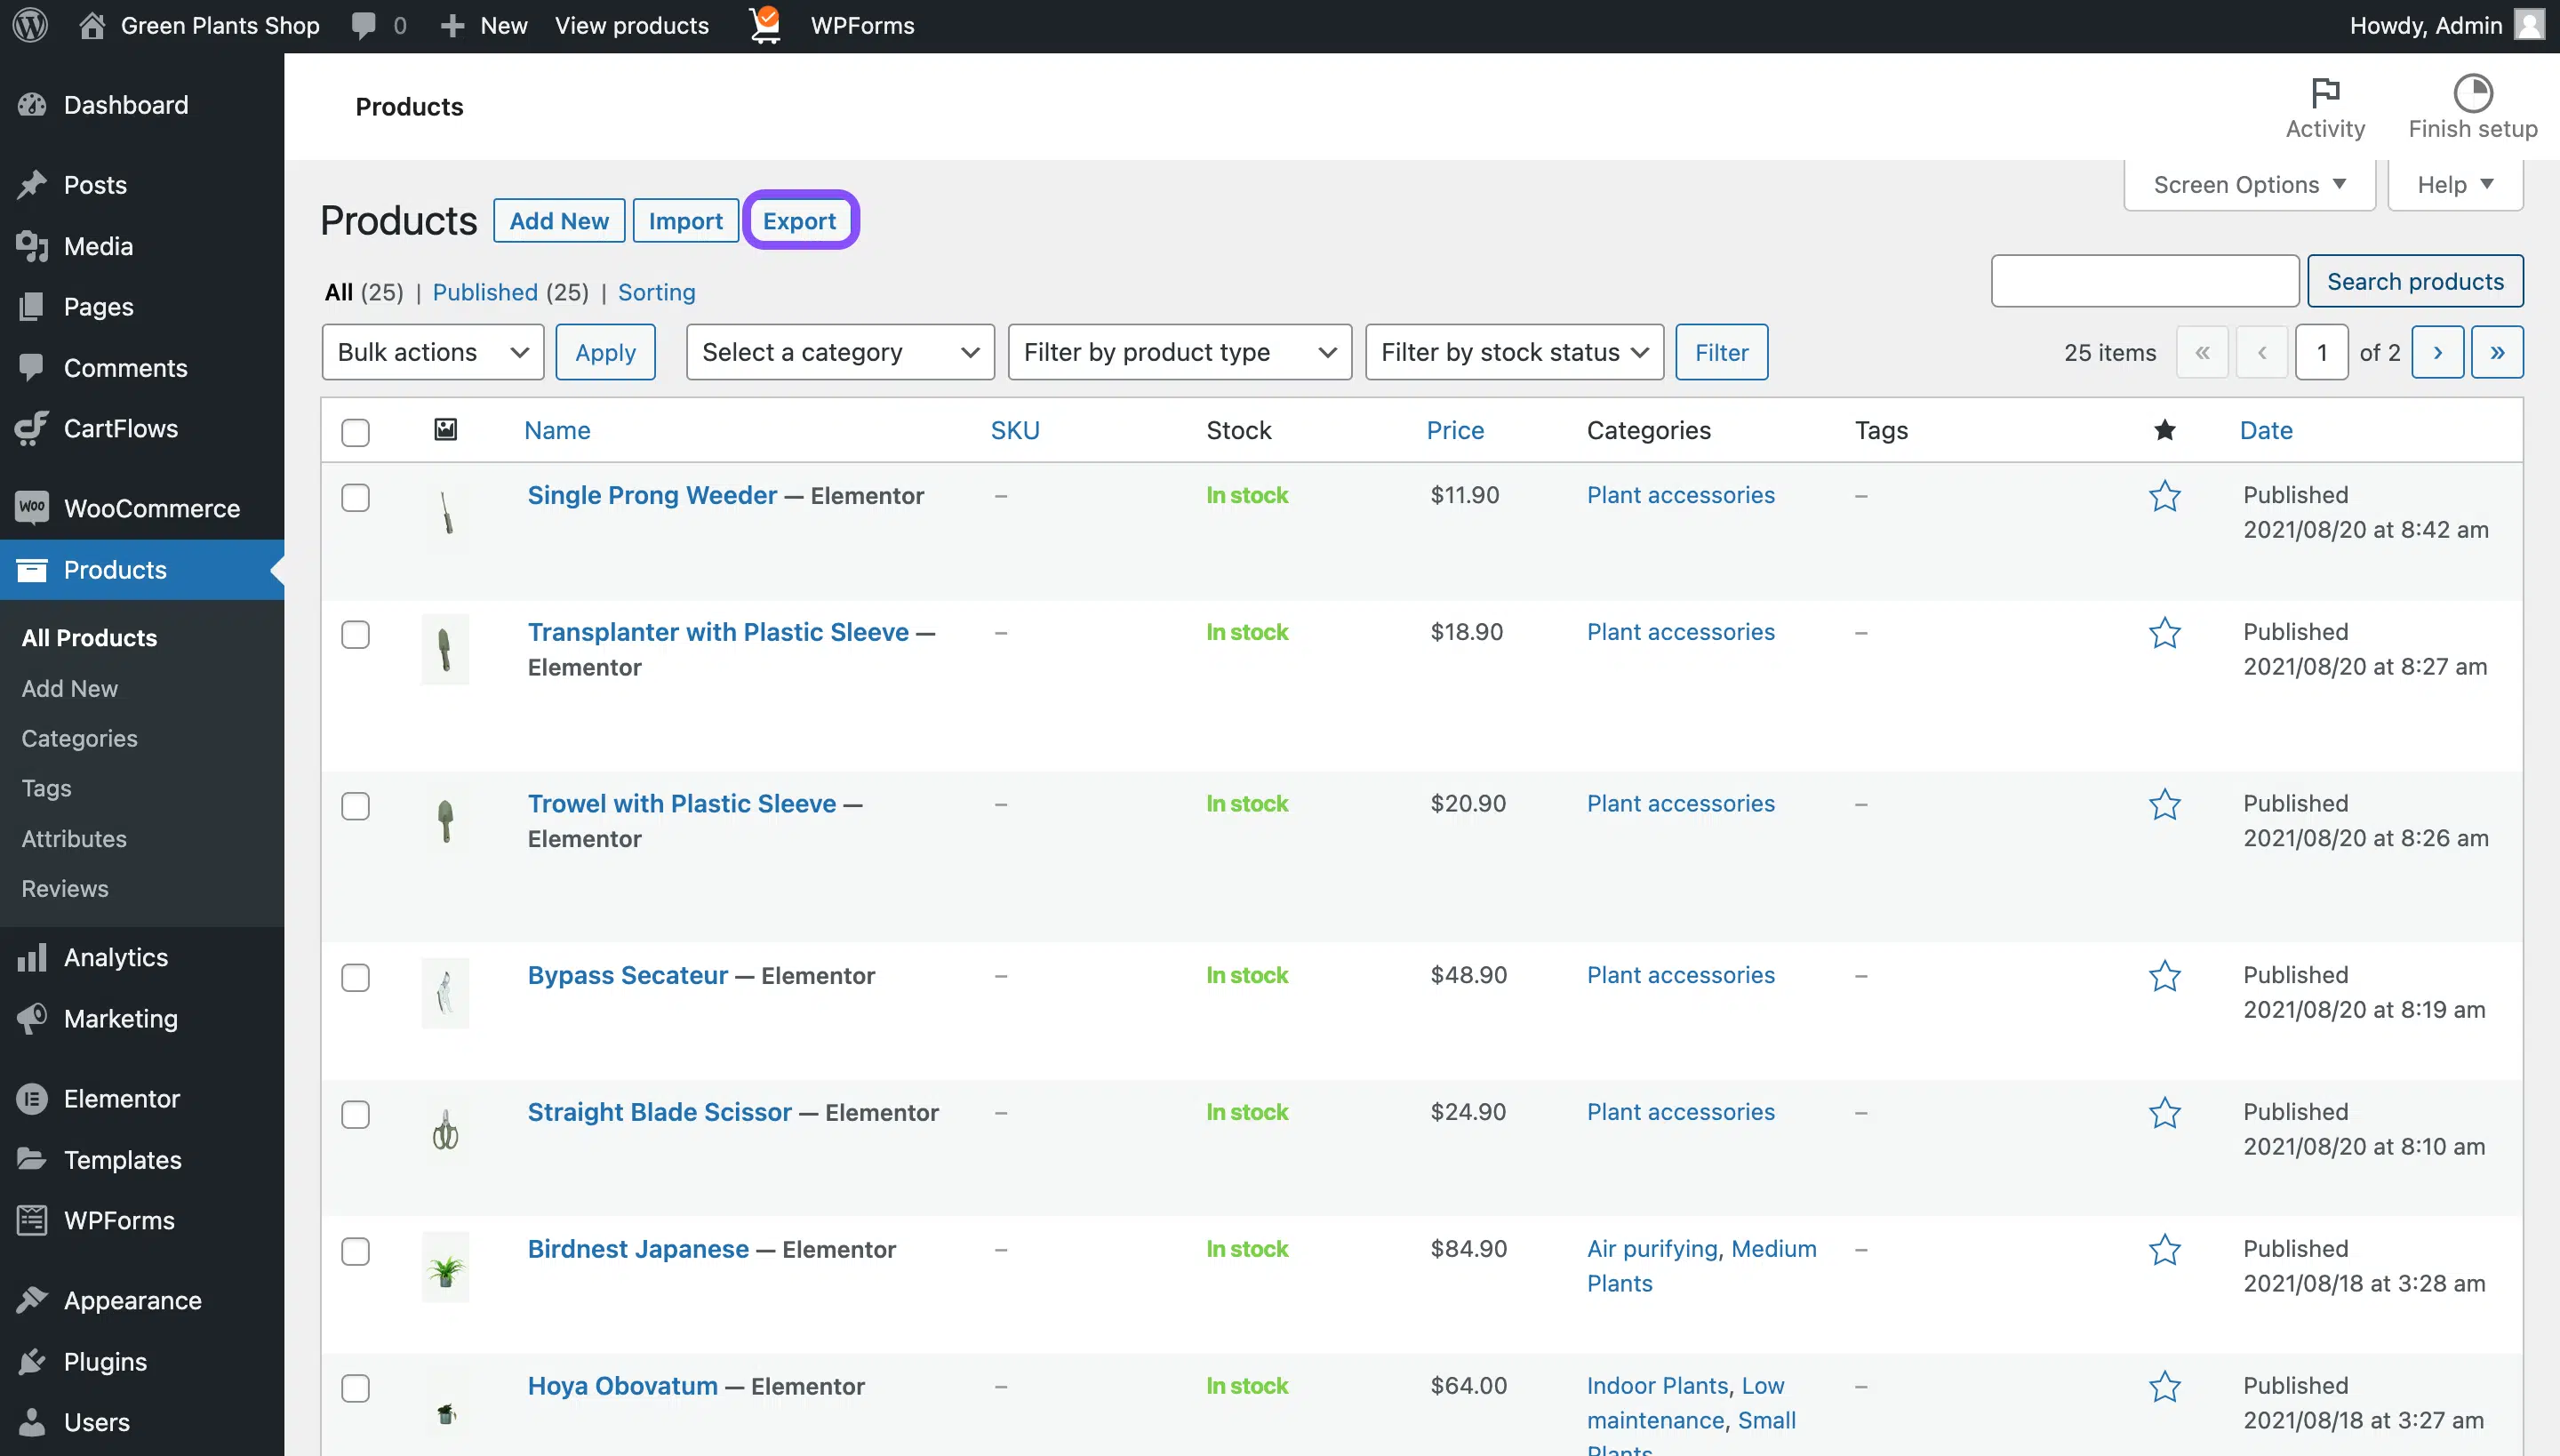
Step 2: When you see a list with all products on the right, click the Export button at the top of your screen.
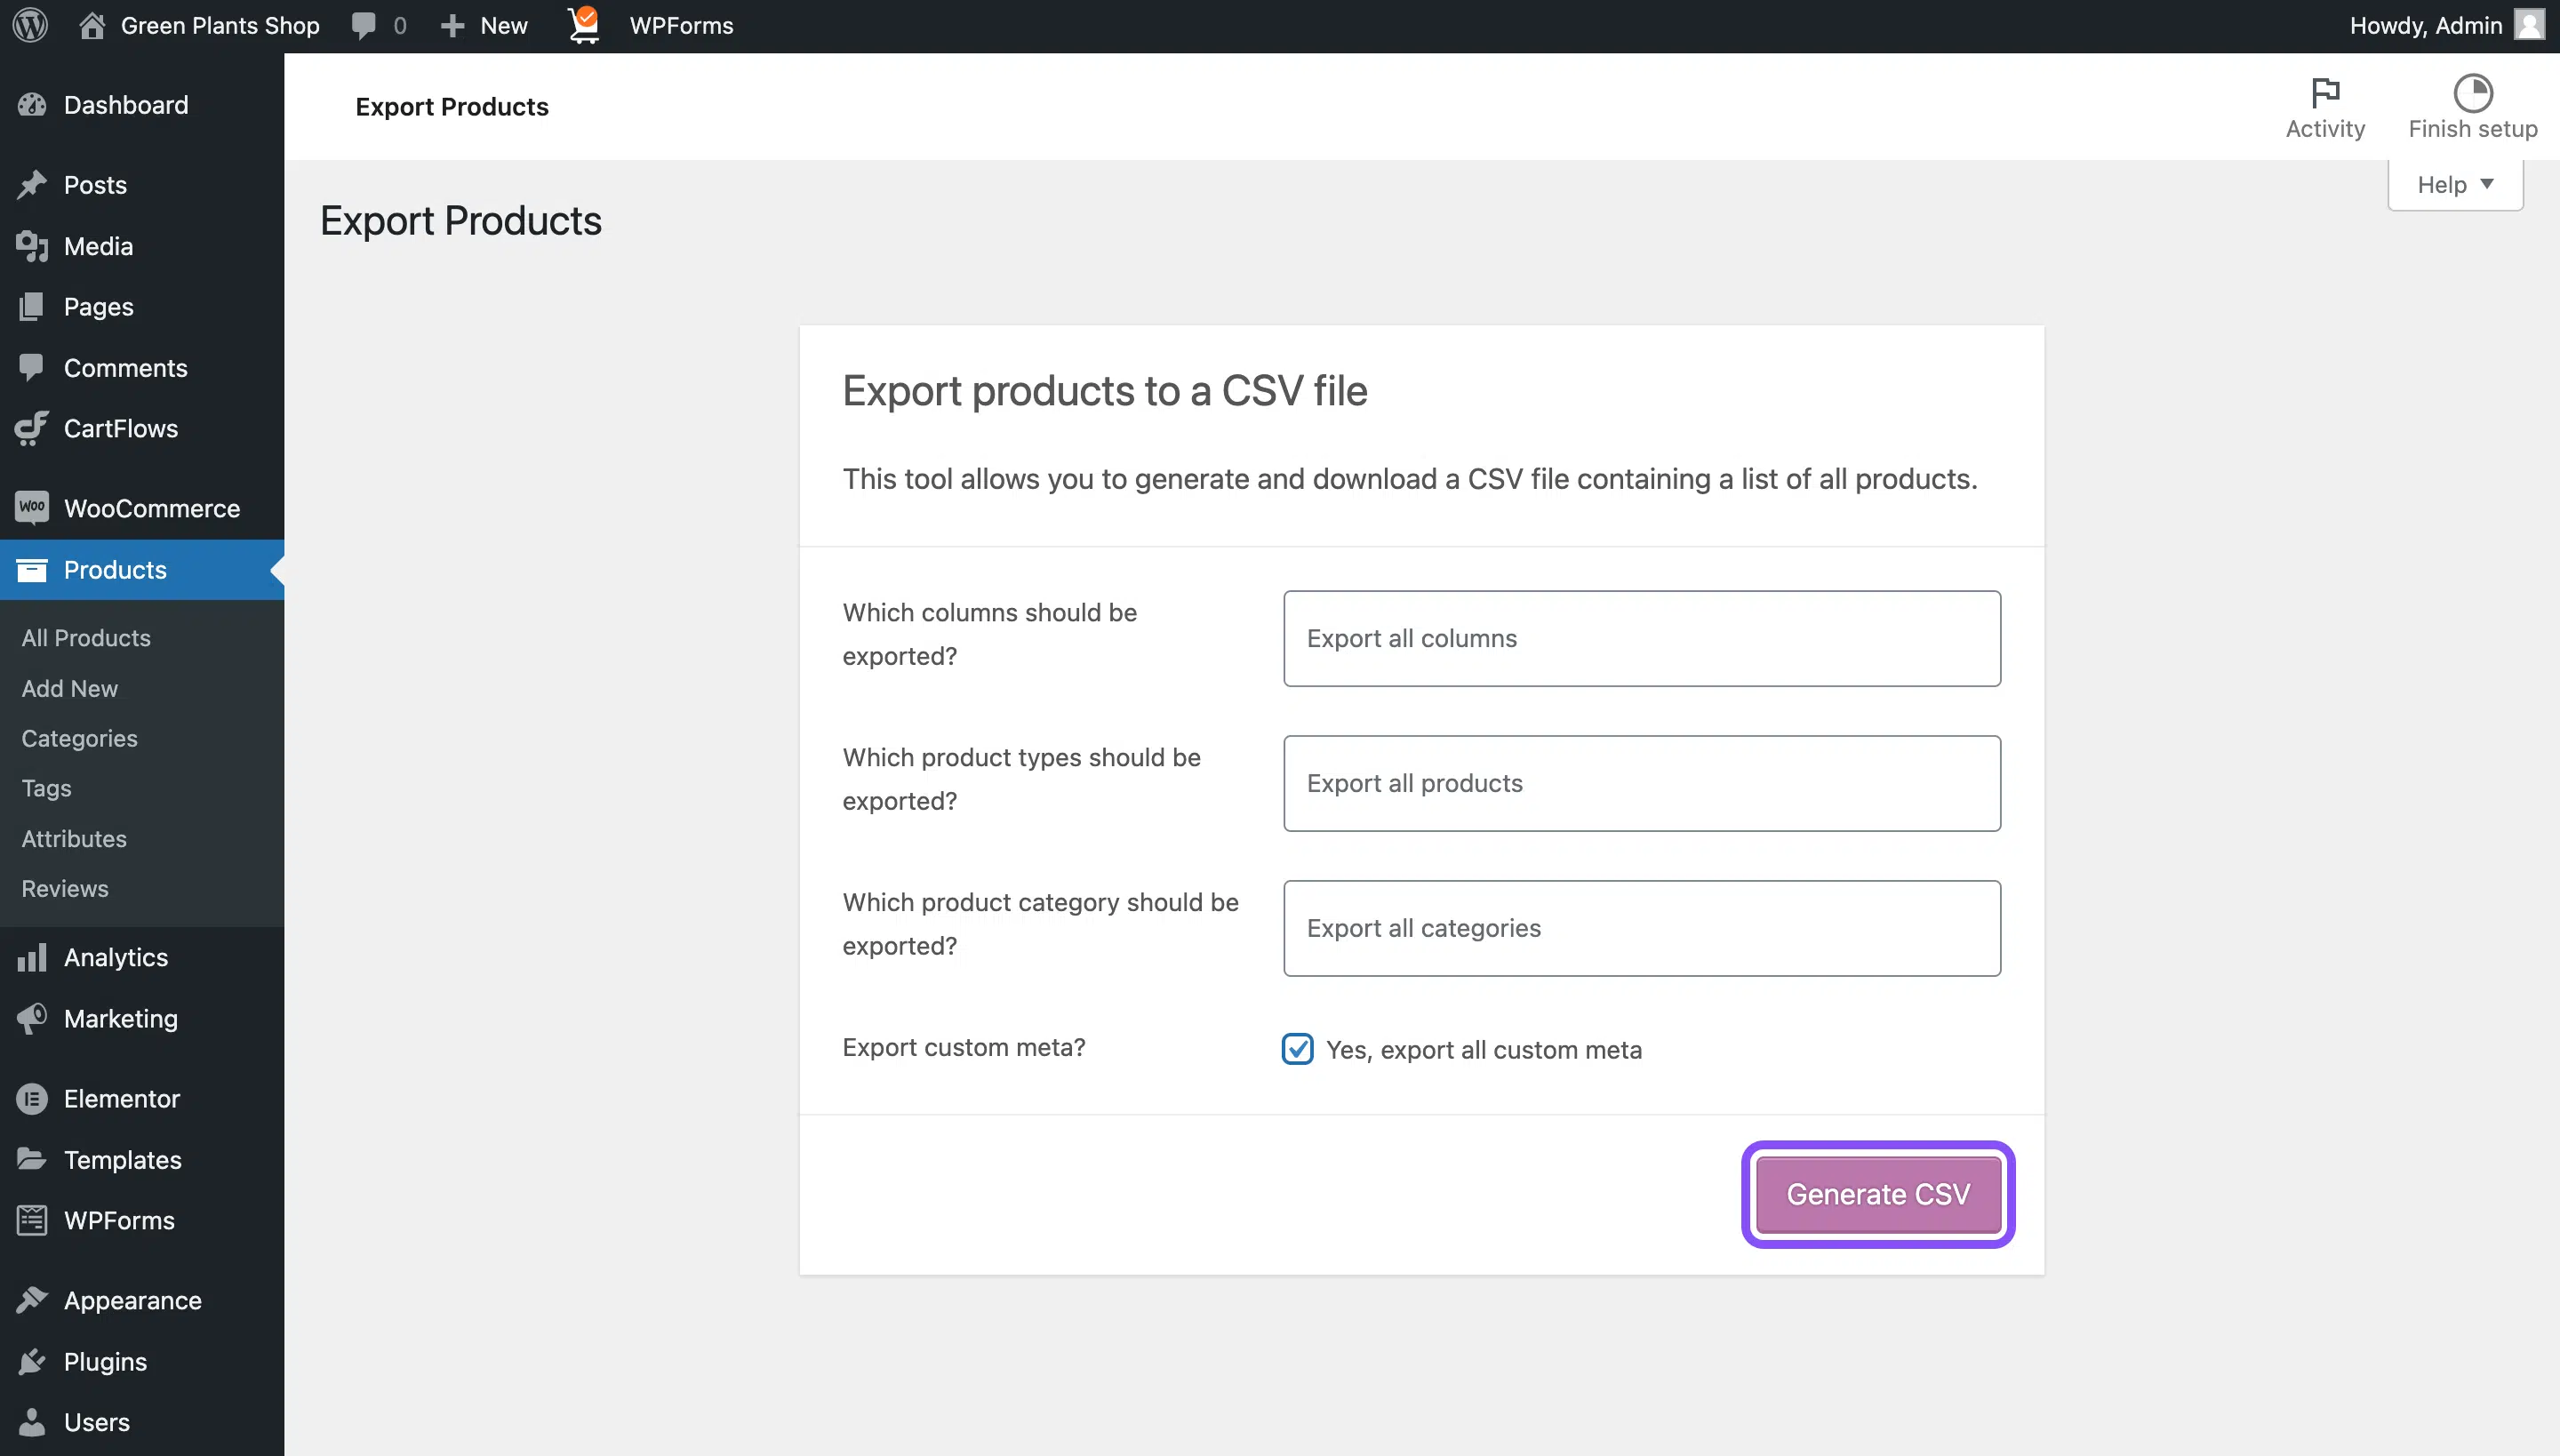
Step 3: On the right, you’ll see a screen with ‘Export products to a CSV file‘ where you can select and export all custom meta (as shown in the image below). Alternatively, if you do not want to export all data, you can choose which columns, product types, and product categories to export. When you’re done with the selection, click Generate CSV.
Please note that the built-in product exporter is a basic feature. If you need more advanced features, you should install a third-party plugin.
Exporting WooCommerce Products Using a Plugin
There are over 900 WordPress plugins created specifically for WooCommerce websites. There are usually more than five plugins for every need, and they differ in the number of features they offer. Given that WooCommerce is all about e-commerce websites, most WooCommerce plugins are designed to make the payment process easier. There are also some plugins that can help with the process of exporting and importing products, which is exactly what we need here.
Here is a list of the top three product export plugins ranked by the number of active users:
- Product Import Export for WooCommerce | 80,000+ active installations
- WP Import Export Lite | 20,000+ active installations
- WooCommerce – Store Exporter | 10,000+ active installations
For this guide, we’ll use the Product Import Export for WooCommerce plugin, which currently has the most active users. You can skip the first step if you have already installed this plugin on your WordPress website. If not, the first thing you need to do is to search for this plugin. Let’s see the steps 👇
Step 1: Go to Plugins ➛ Add New.
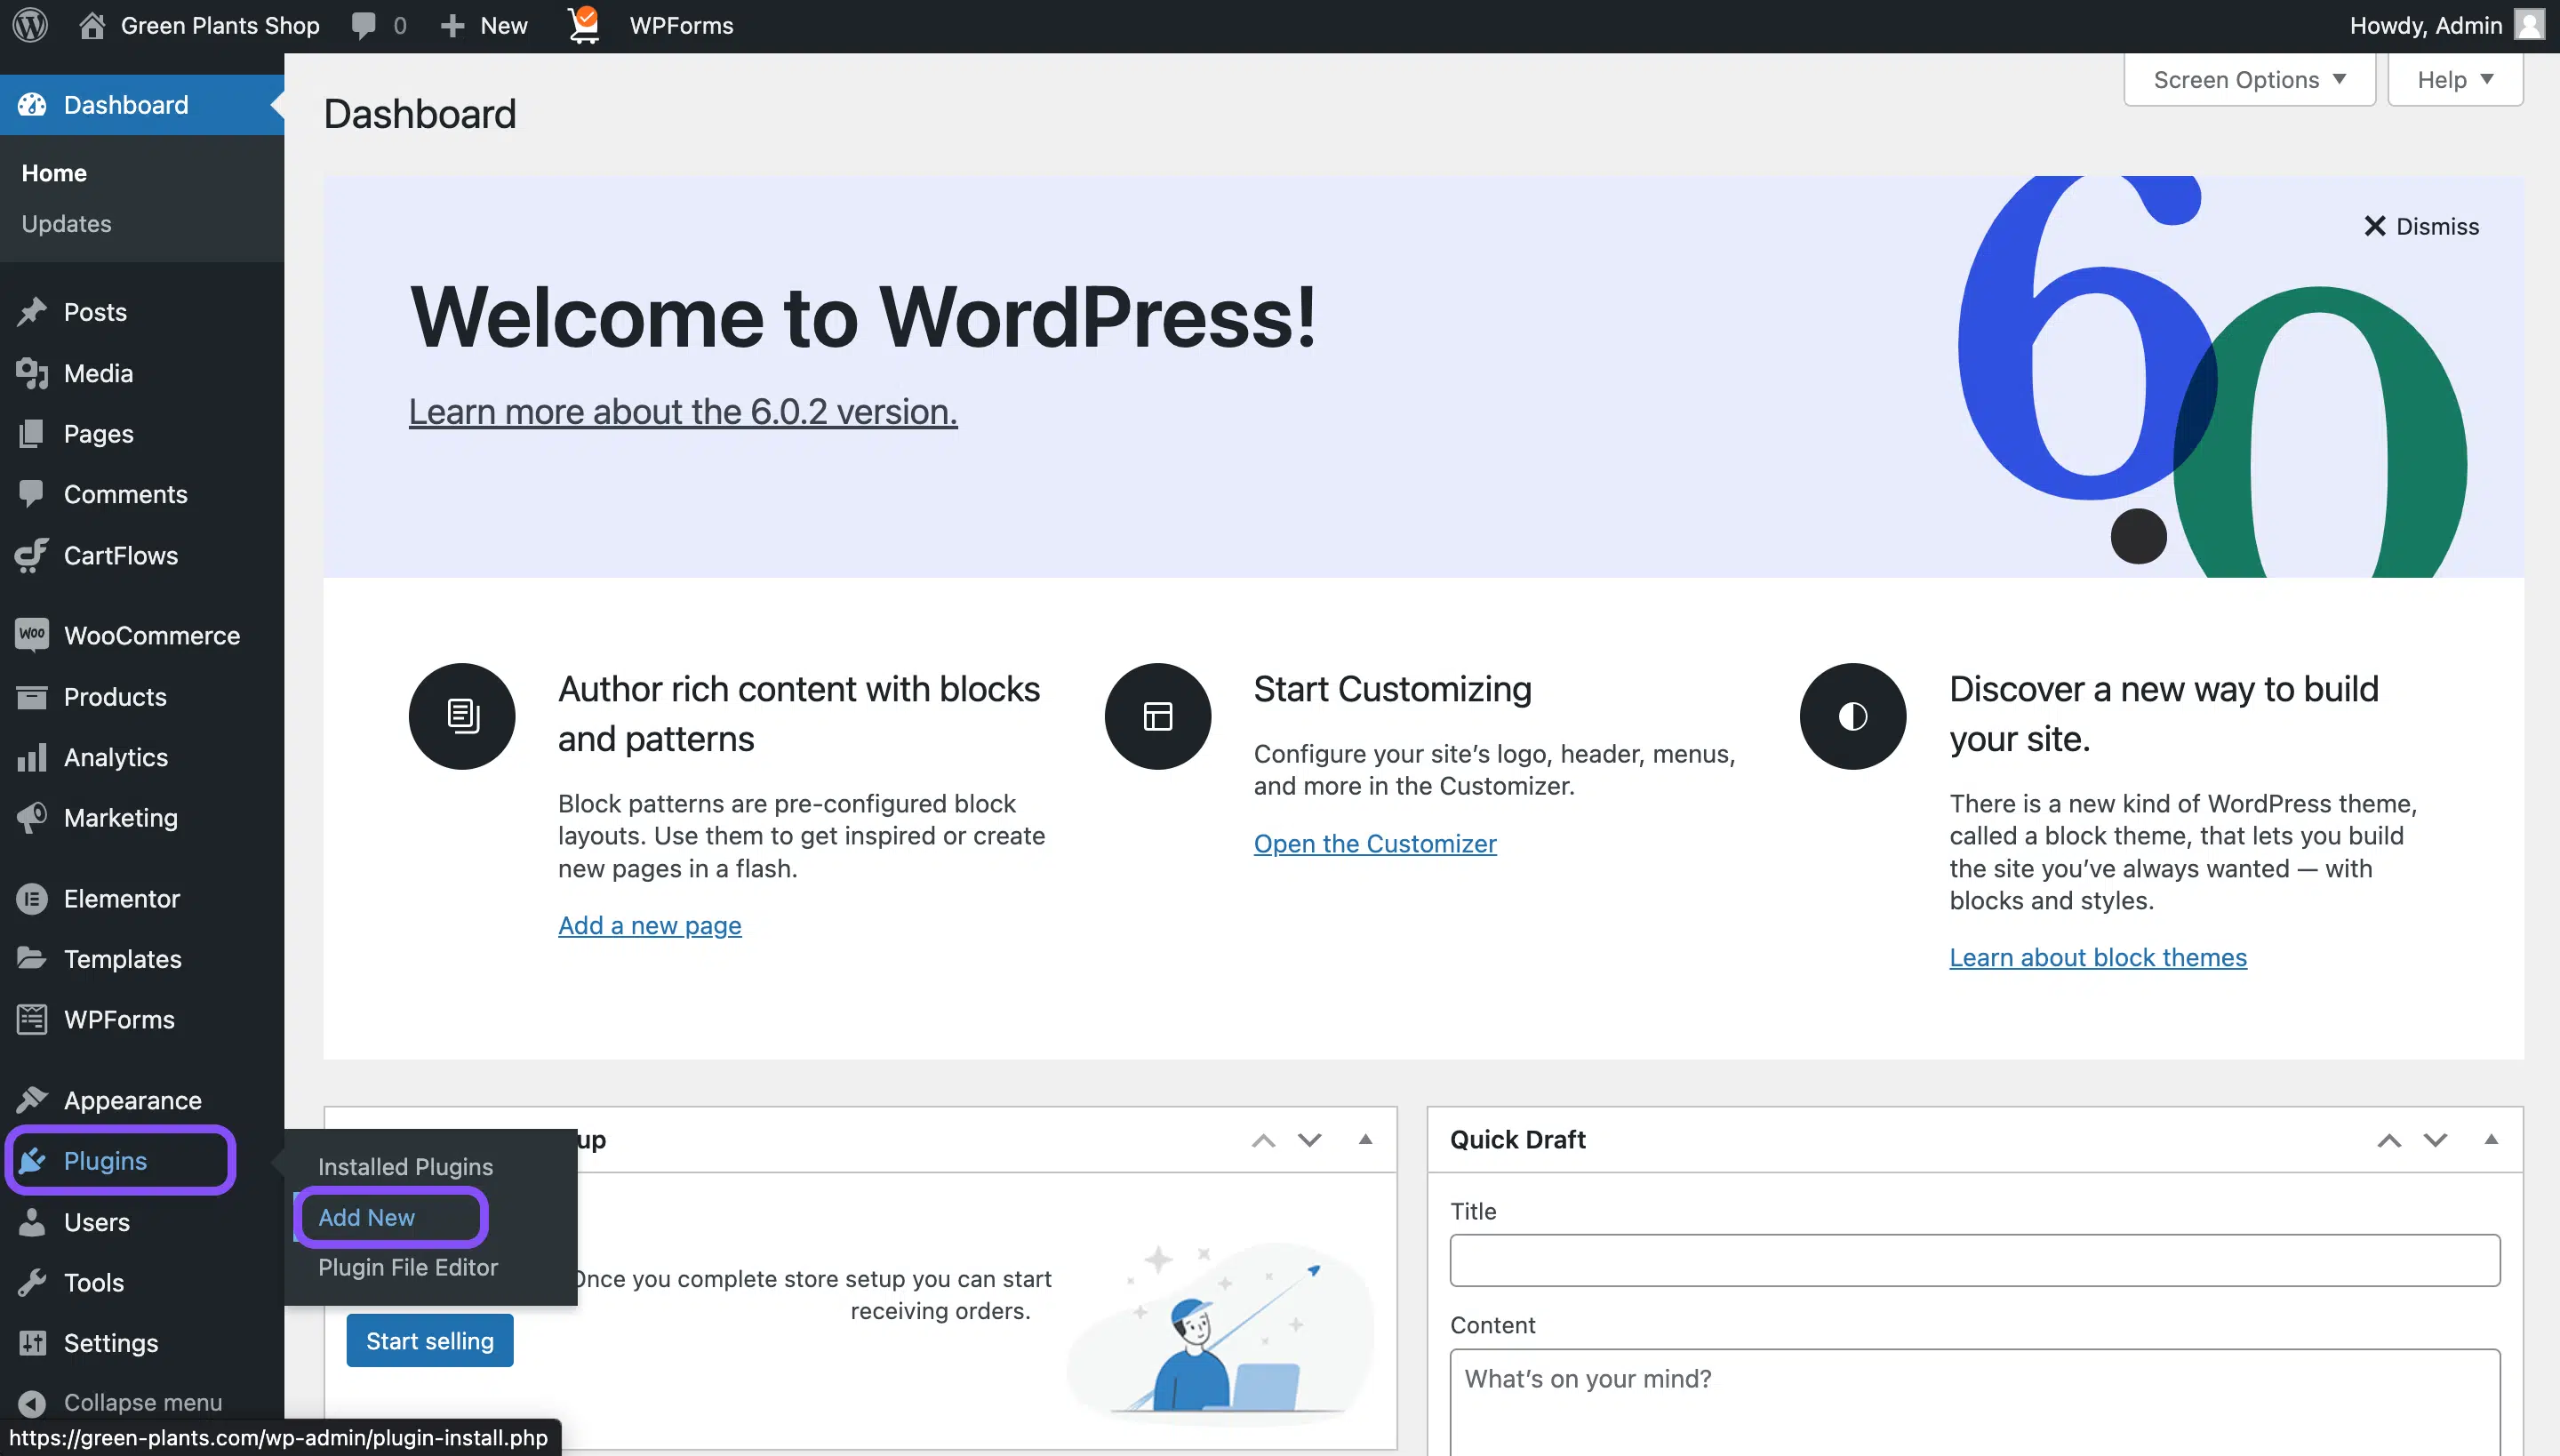
On the right will be opened the Add Plugins screen. Here you can upload a plugin you have already purchased or search for a new plugin directly from WordPress.org via the search bar.
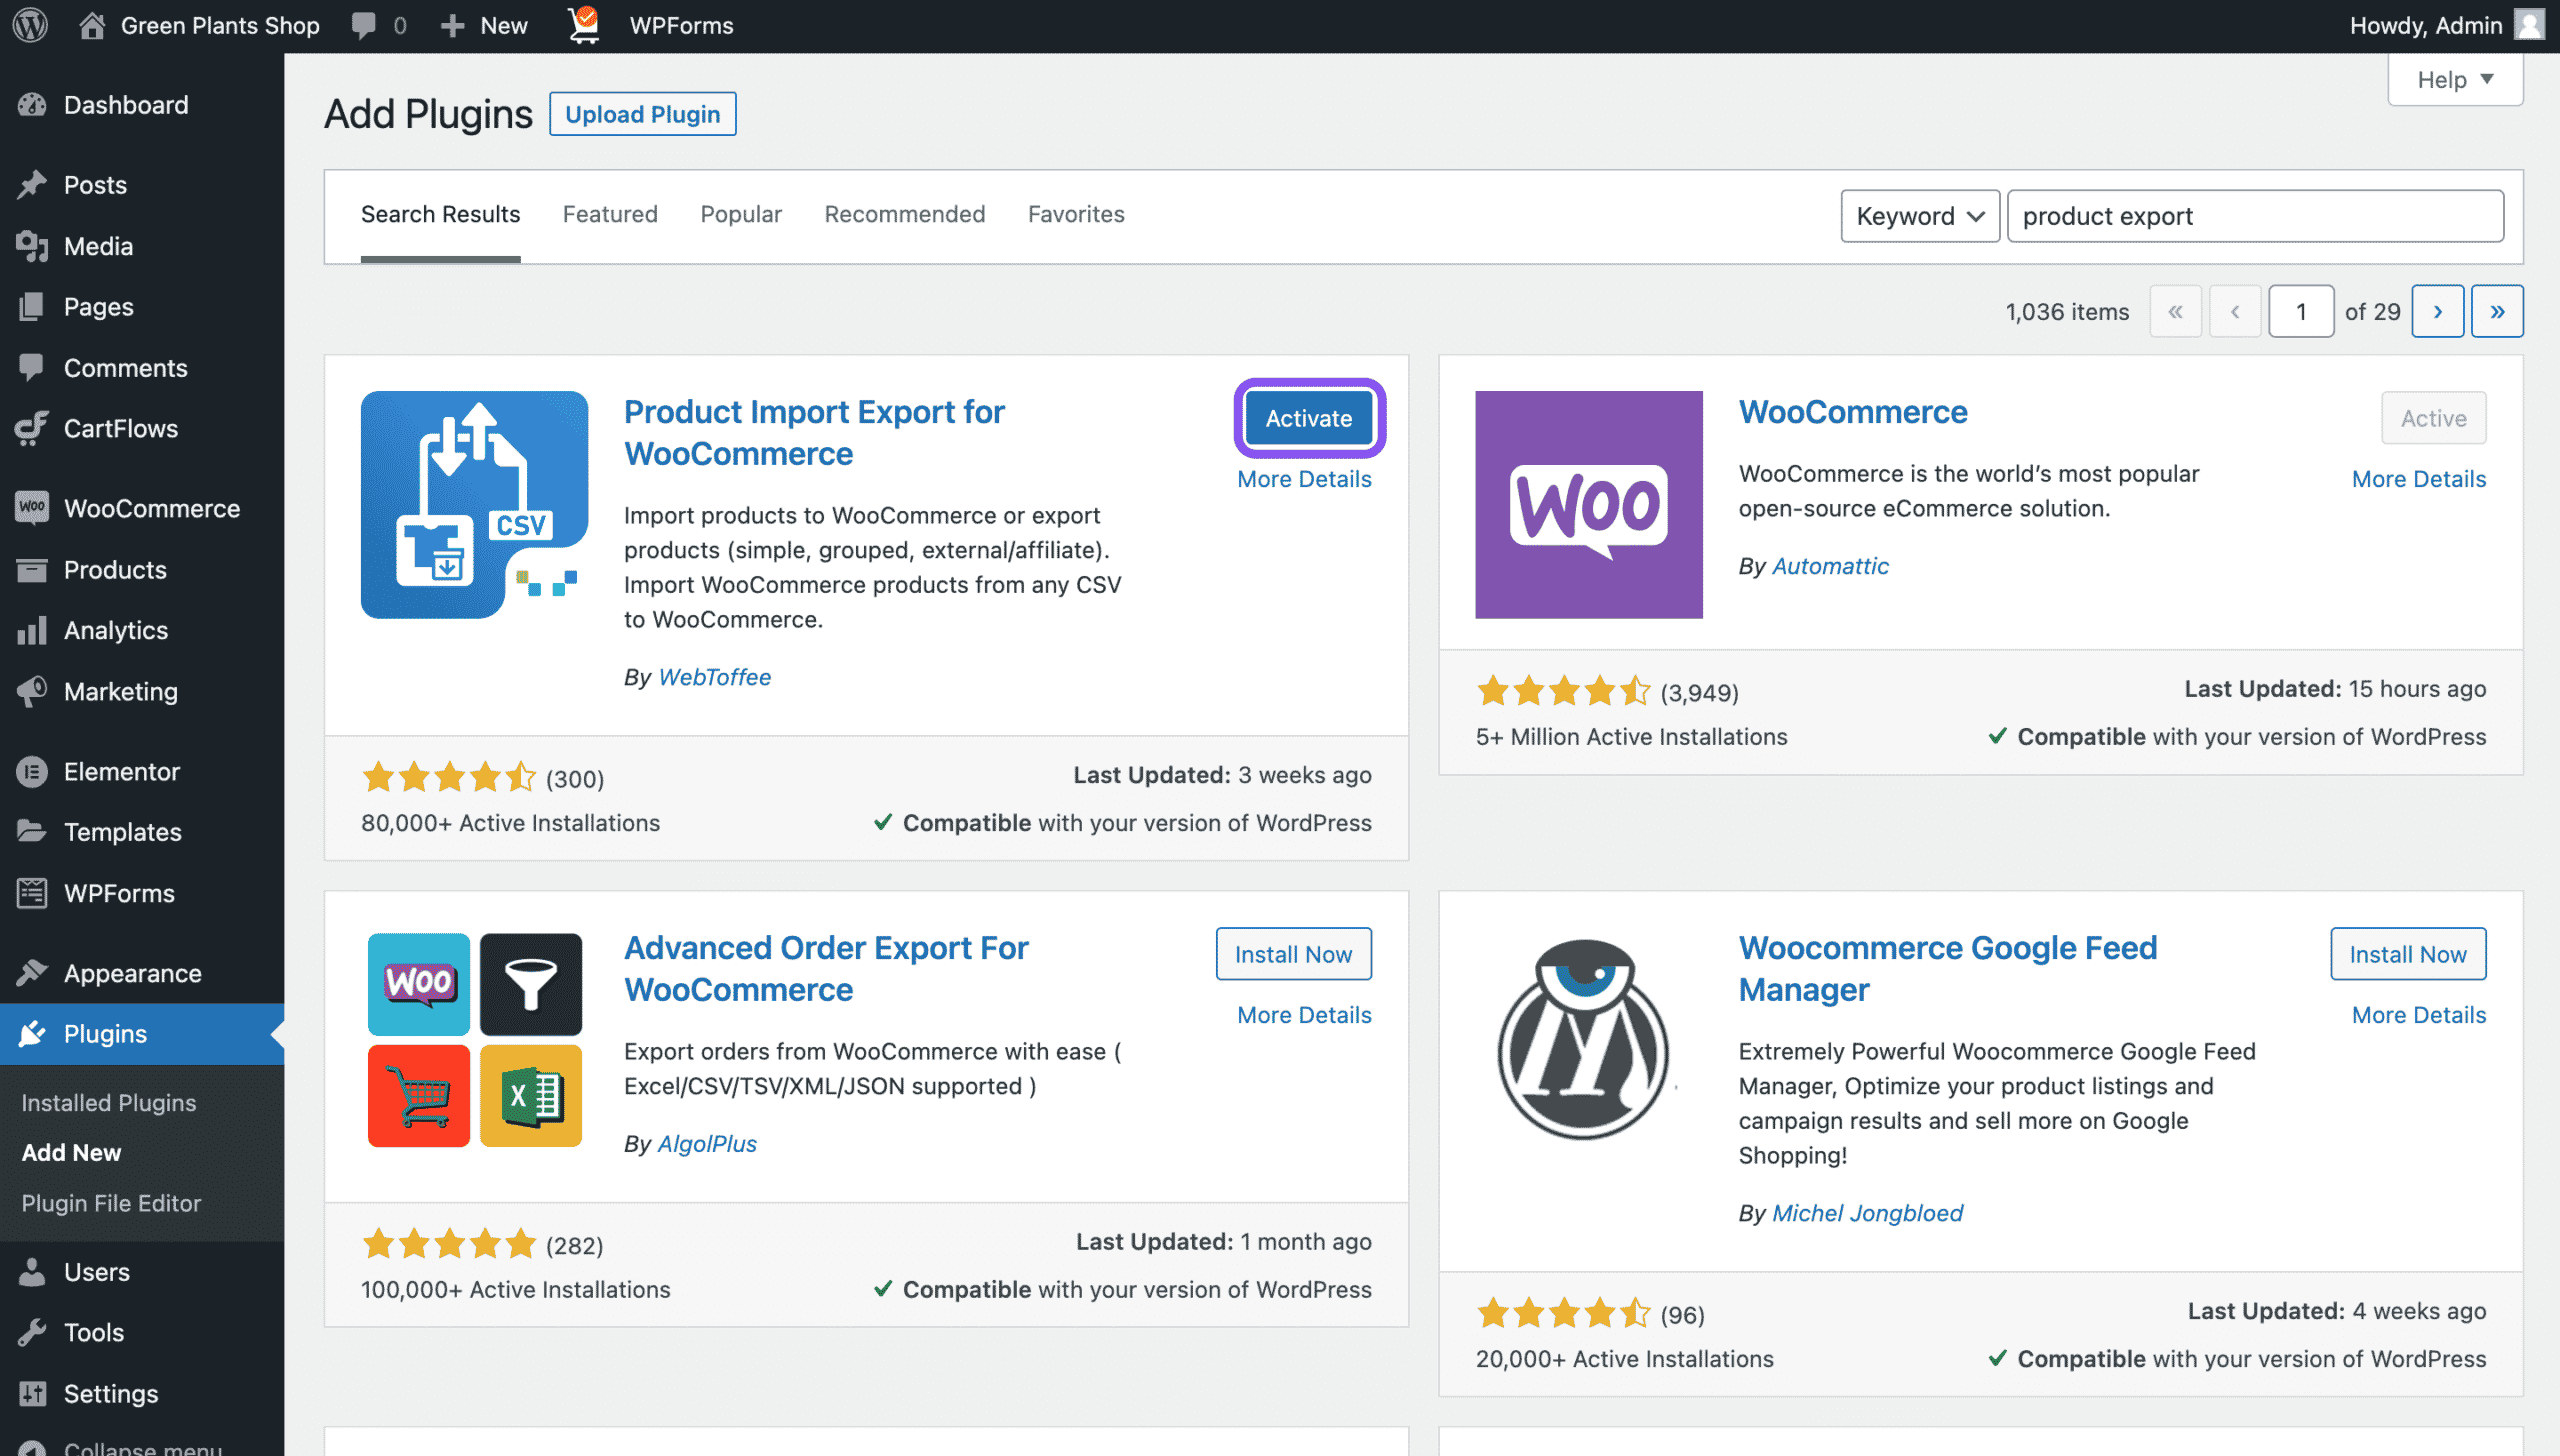
Step 2: Enter ‘Product export plugin’ into the search box in the top right corner of the screen. When the results are displayed, and you see the plugin Product Import Export for WooCommerce, click the Install Now button.

Step 3: After installation, you need to activate the plugin. You can do this by clicking the Activate button, as shown in the image below.
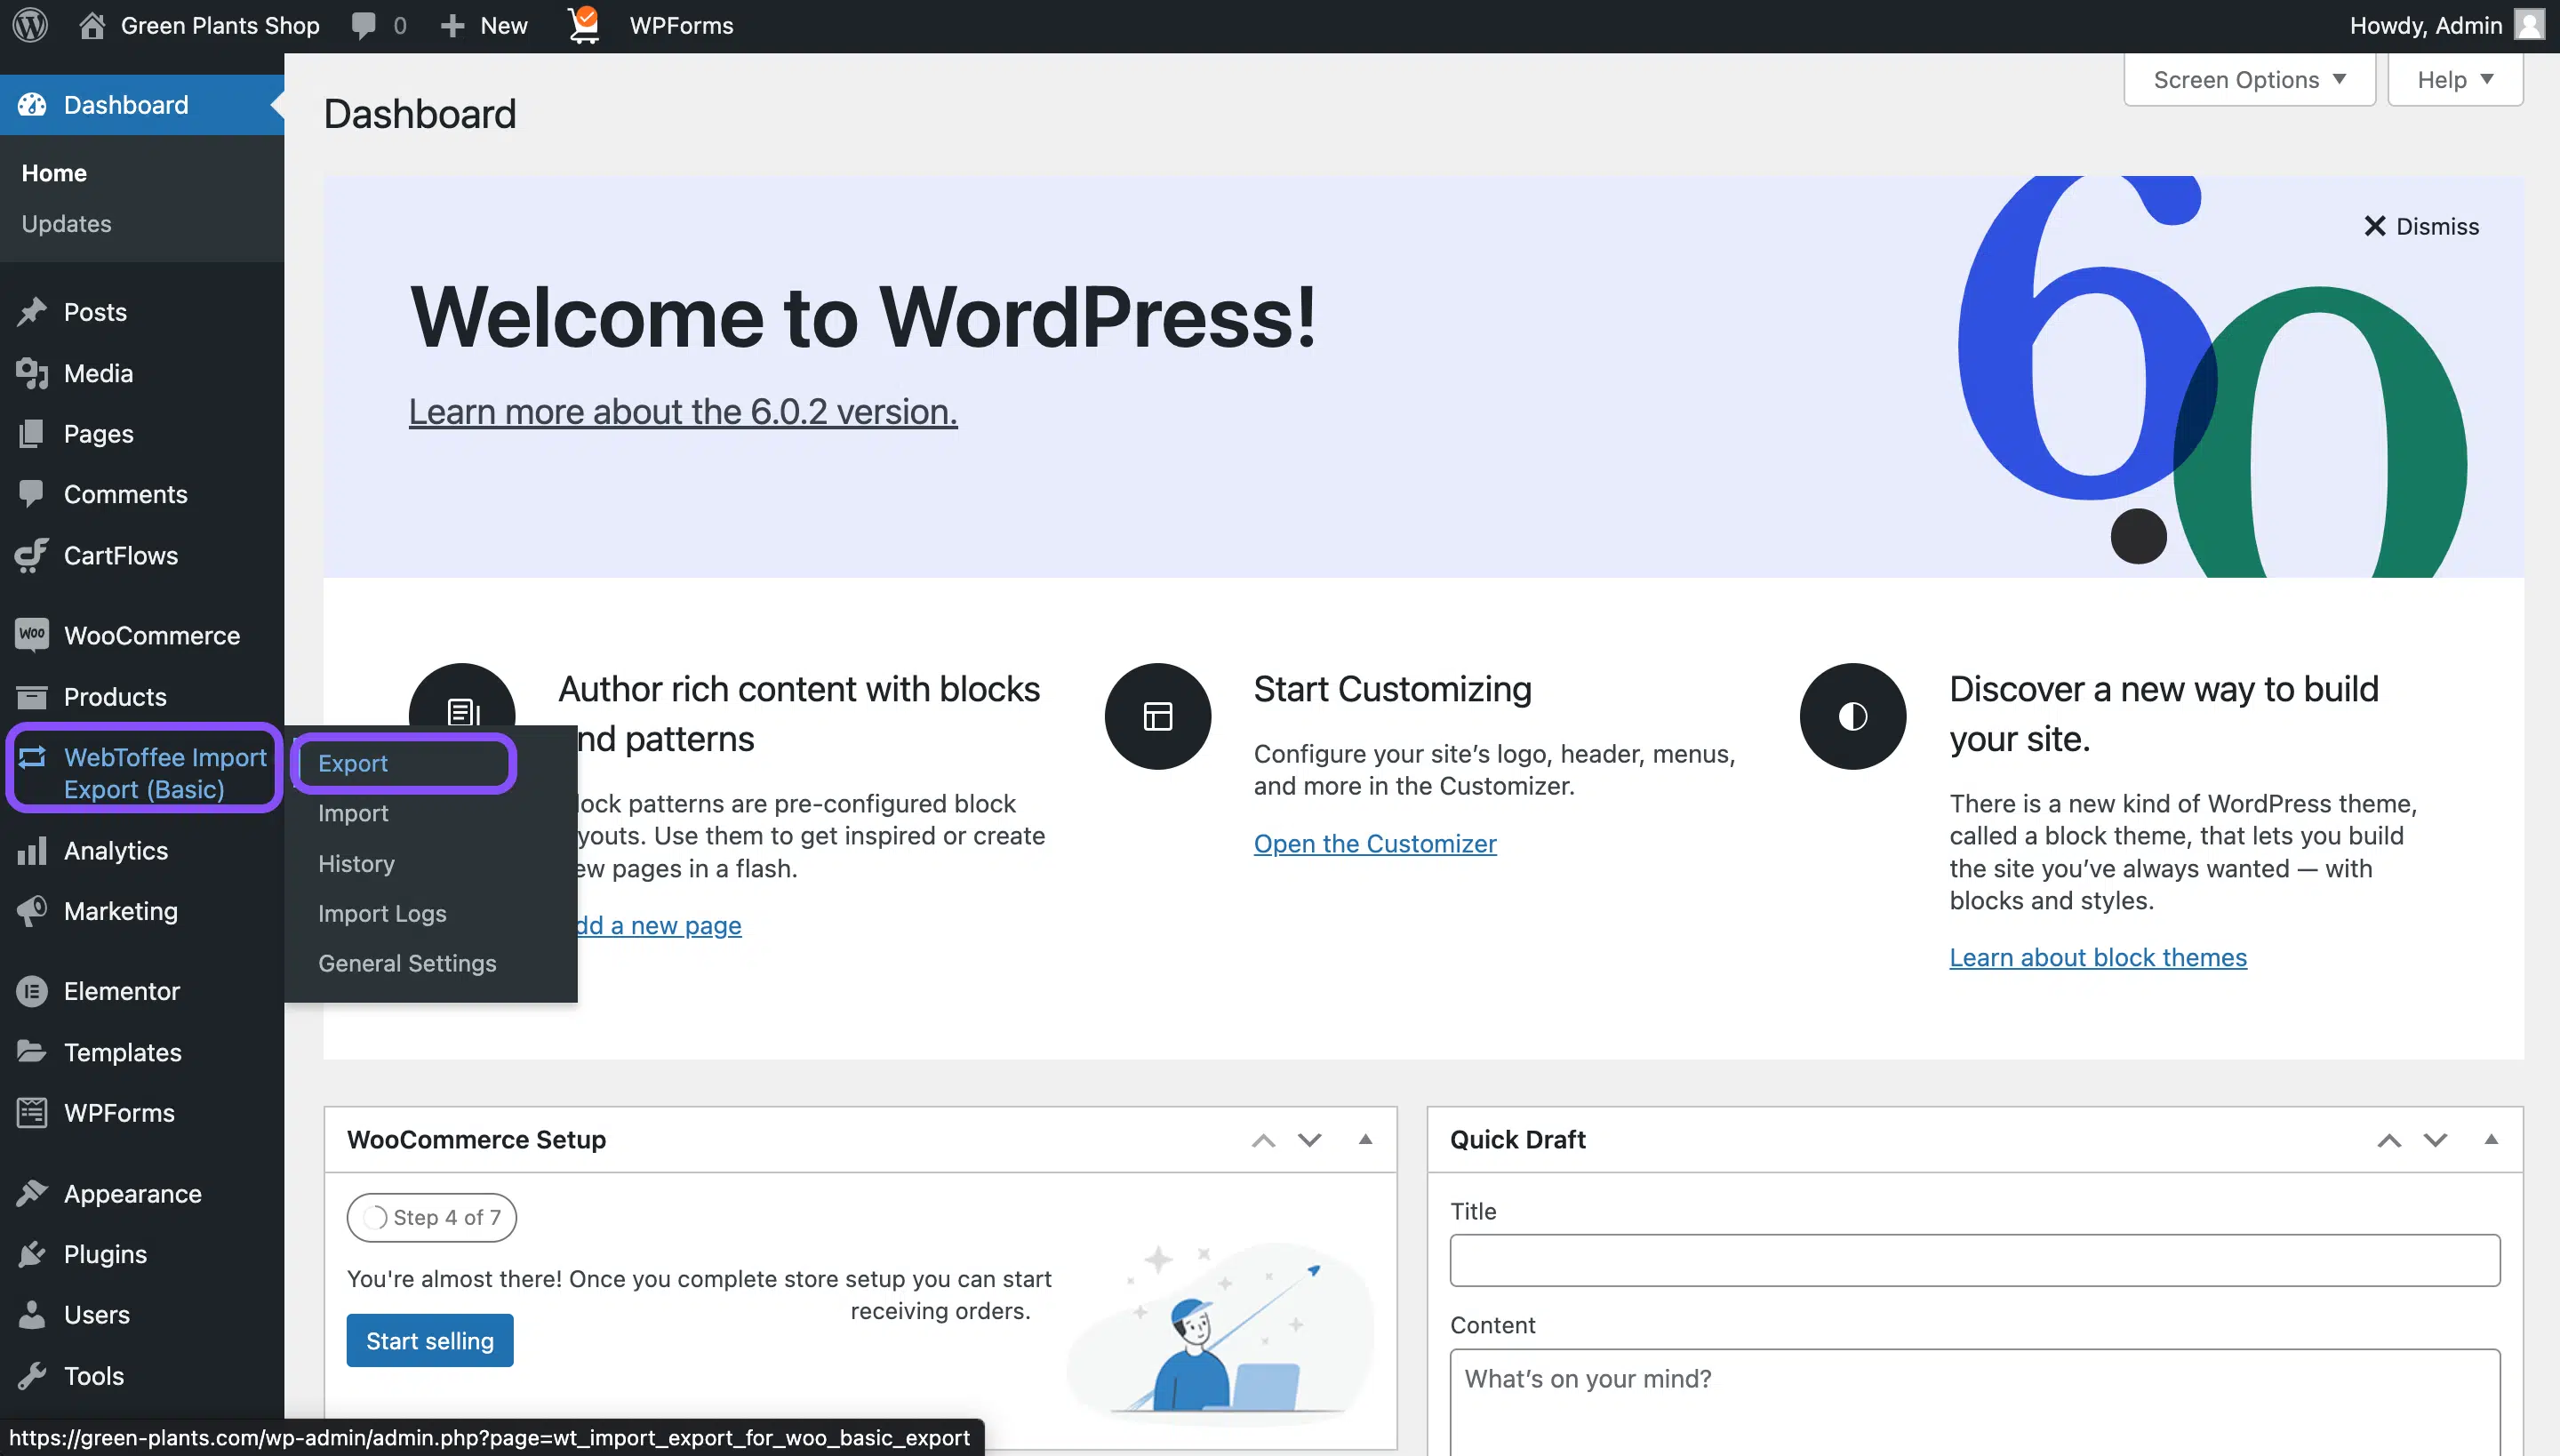
After activating this plugin, you can see it on the Dashboard on the left, right below Products.
Step 4: Go to WebToffee Import Export ➛ Export to export your products.
A new screen will open, and you will need to complete the following five steps to export your products:
1. Select a post type. You can choose to export and download data for one of the following post types: Order, Coupon, Product, Product Review, Product Categories, Product Tags, and User/Customer.
2. Select an export method. You can choose between a quick and advanced export.
3. Filter data. Depending on your requirements, you can filter the data before exporting it using any or all of the following criteria:
- Total number of products to export
- Skip first n products
- Products
- Stock status
- Exclude products
- Product categories
- Product tags
- Product status
4. Map and reorder export columns. This step allows for editing the default export column names.
5. Advanced options/Batch export.
Finally, when you’ve entered the preferred info, you can click on Export and wait until the file processing is complete so you can download your CSV file.
For a more visual guide, you can check the video below.
Exporting Products Using WordPress Plugin | Product Import Export for WooCommerce
And that’s it. You can now use this CSV file with the data from your web store’s products for your own purposes. I hope this step-by-step guide will be helpful to you 🤓