Over the last few years, the web hosting industry has been disrupted with the emergence of the new cloud and container-based technologies. The Shared and VPS hosting industry has been kicked off its throne as many see these two new technologies as the next evolution of web hosting.
And we agree. By putting your application in containers with a couple of code lines, you can achieve redundancy and scalability by distributing your applications across the world, a dream of all SRE engineers.
But I wouldn’t have written this blog post if I didn’t have something to add on this subject, right?
We all know that every “dark magic” comes at a price, so this one too. It’s either you learn how to manage clusters of Kubernetes or Docker swarm nodes, or you pay someone that knows how to do this pretty well. In either situation, it will cost you way more to host your simple informational website or WordPress blog on the cloud, instead of on $1.99/month shared hosting. In addition, the steep learning curve that comes with these new technologies will be challenging to overcome by many junior developers and website owners, which are precisely the target group of the shared hosting providers.
Anyway, these technologies’ emergence is a great thing, mainly because they woke up the shared hosting industry, so it had to evolve not to get extinct. And the best way to do this is through adopting new technologies and innovation.
Hasta la Vista LAMP
At BlackHOST, we love PHP, but I must say that we cheered the day when this famous technology stack was not the only option available in the shared hosting environment. And all thanks to the container-based technology.
In the past, all shared hosting providers had issues isolating the user spaces between the clients on the same node and limiting them to the allocated resources. Situations like frequent downtimes and laggy websites were normal, as a single client could consume all the resources on the node and halt all other operations. This is where container-based virtualization came into play. By isolating each client into its container governed on kernel level, we could have much better isolation and hardware resource management control while still getting the same benefit of using shared libraries from the host.
But putting clients in their containers opened other possibilities, such as running custom backends, for example, Ruby on Rails 🙂
Entra LAMRoR
Ruby on Rails is a server-side web application framework written in Ruby, where Rails is the MVC framework. It is widely used all over the world on various projects, and most likely, you’ve used some of them: Basecamp, HEY, GitHub, Shopify, Airbnb, Twitch, SoundCloud, Hulu, Zendesk, Square, Cookpad.
With all of this popularity, RoR was one of the obvious choices to be enabled in the shared hosting environment. By changing only the application processor and keeping the other parts of the original Linux, Apache & MySQL/MariaDB stack, we would provide the users a seamless experience and ease of usage through the existing control panels, without sacrificing anything.
In addition to this, the containerized approach allowed us to run multiple versions of Ruby on Rails for the same client account, currently ranging from 1.8 up to 2.6 on our nodes. In fact, this separation can be done on the application level, which means the same client can run multiple Ruby on Rails applications using different RoR versions, various modules, etc.
Quite handy when you want to run some legacy code or test how your staging app would perform on the newest Ruby on Rails release.
So How Can You Do It?
Running Ruby on Rails application has never been easier, as we have enabled this feature on all our unmetered shared hosting plans. With our cPanel integration, you can start your Rails app in no time in a couple of steps:
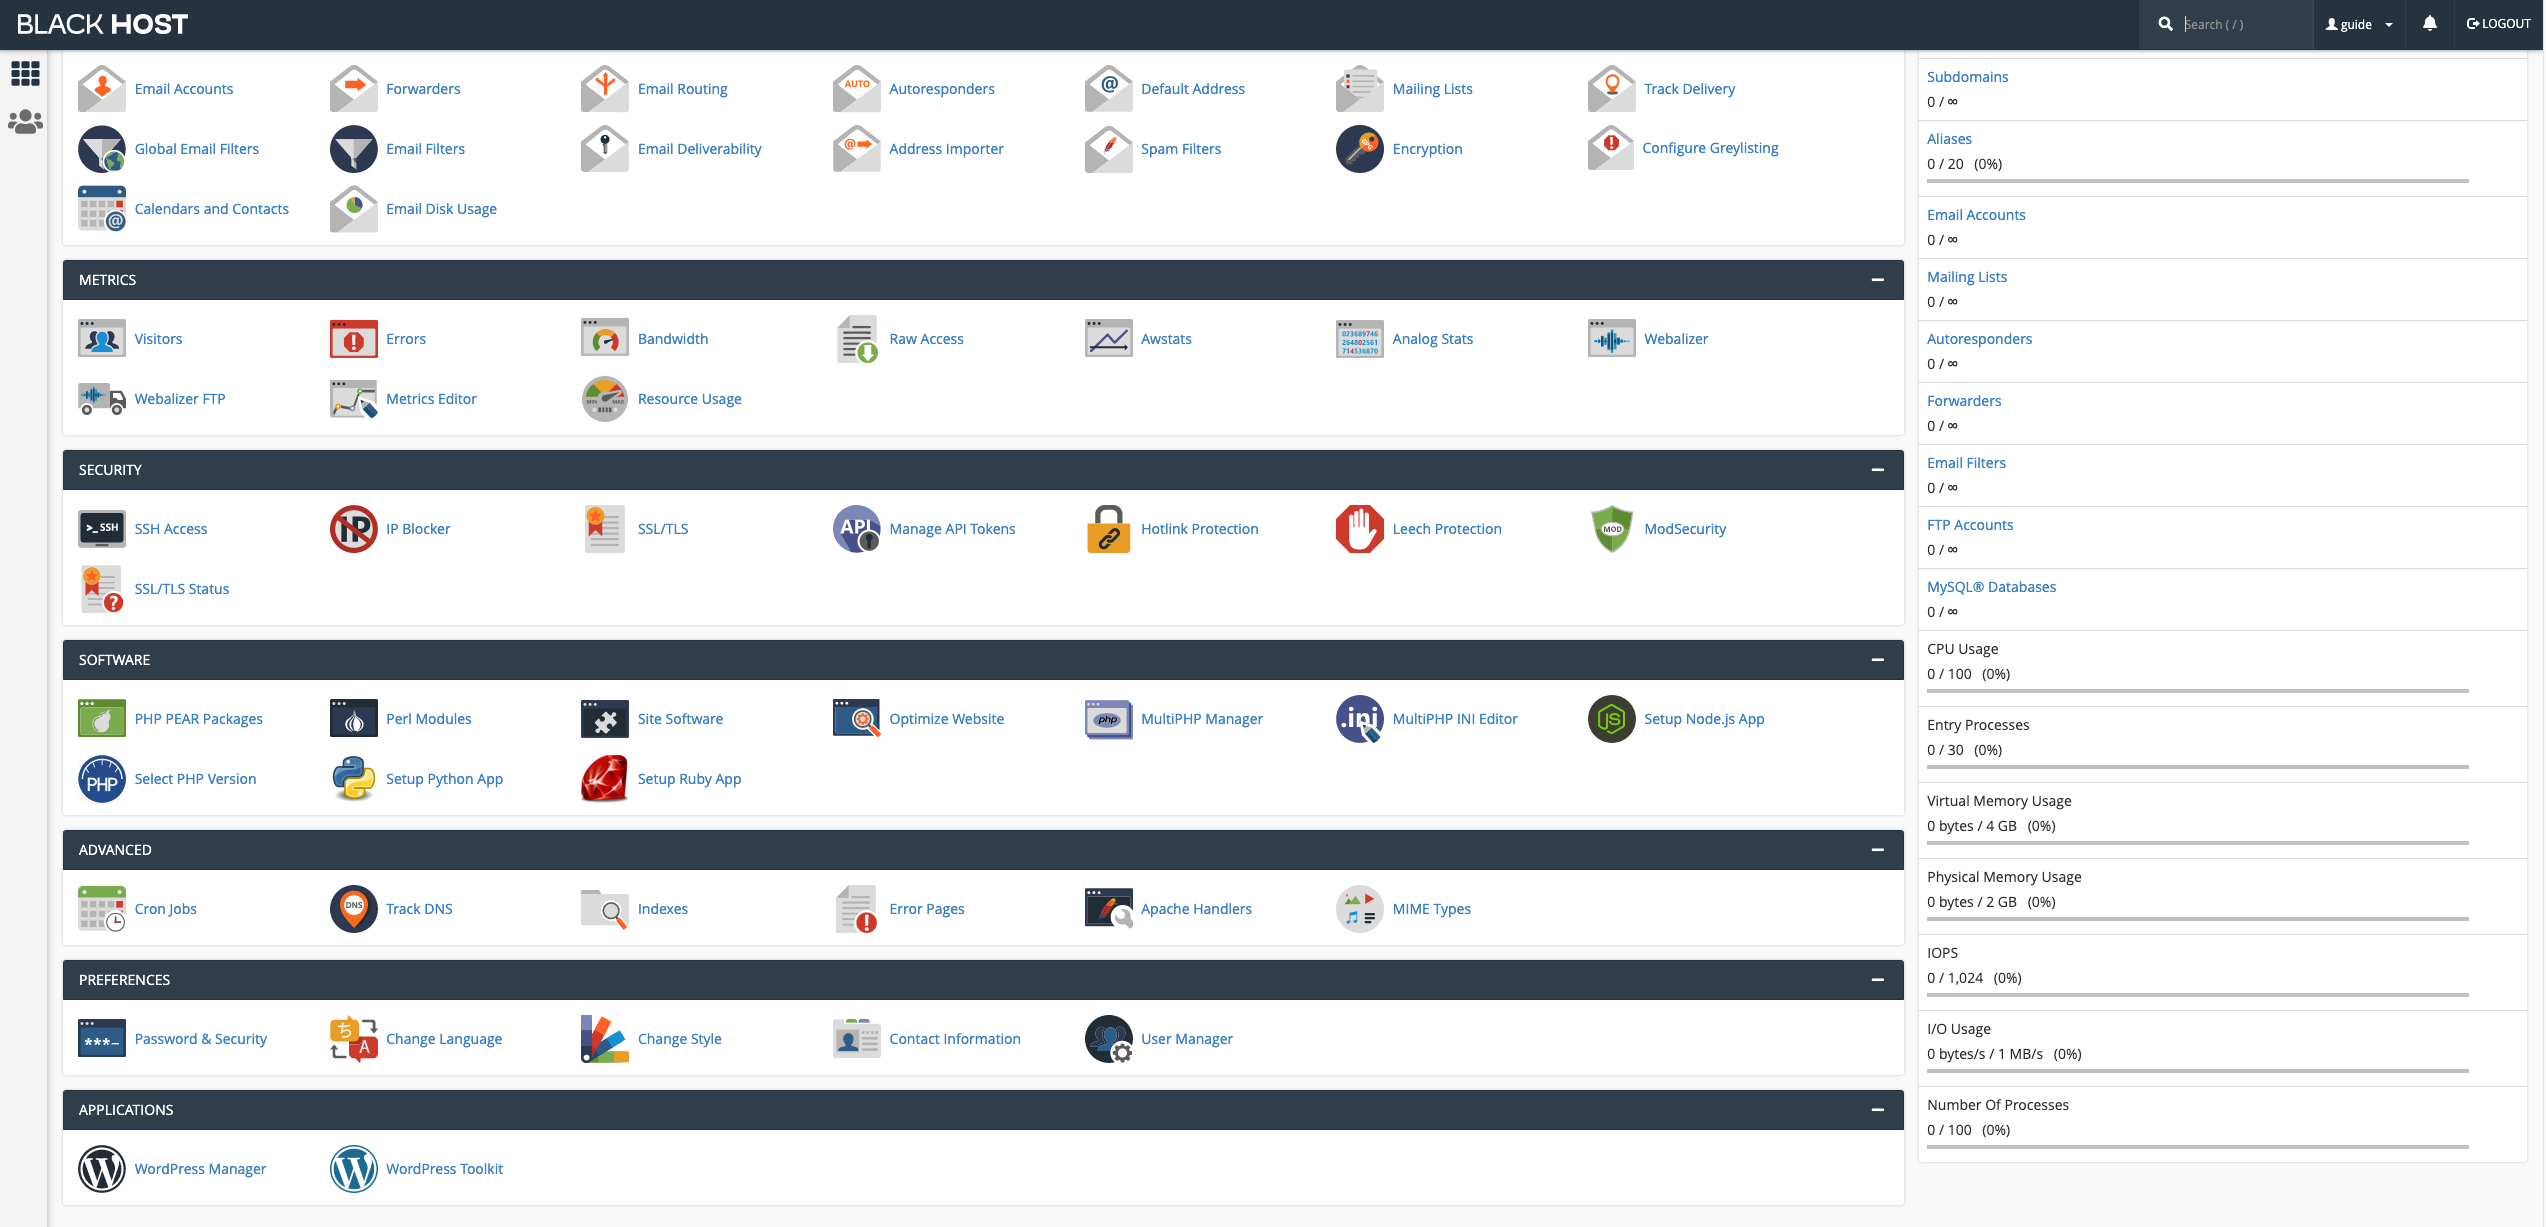
1. Login into your cPanel, navigate to the “software” section, and click Setup Ruby App.

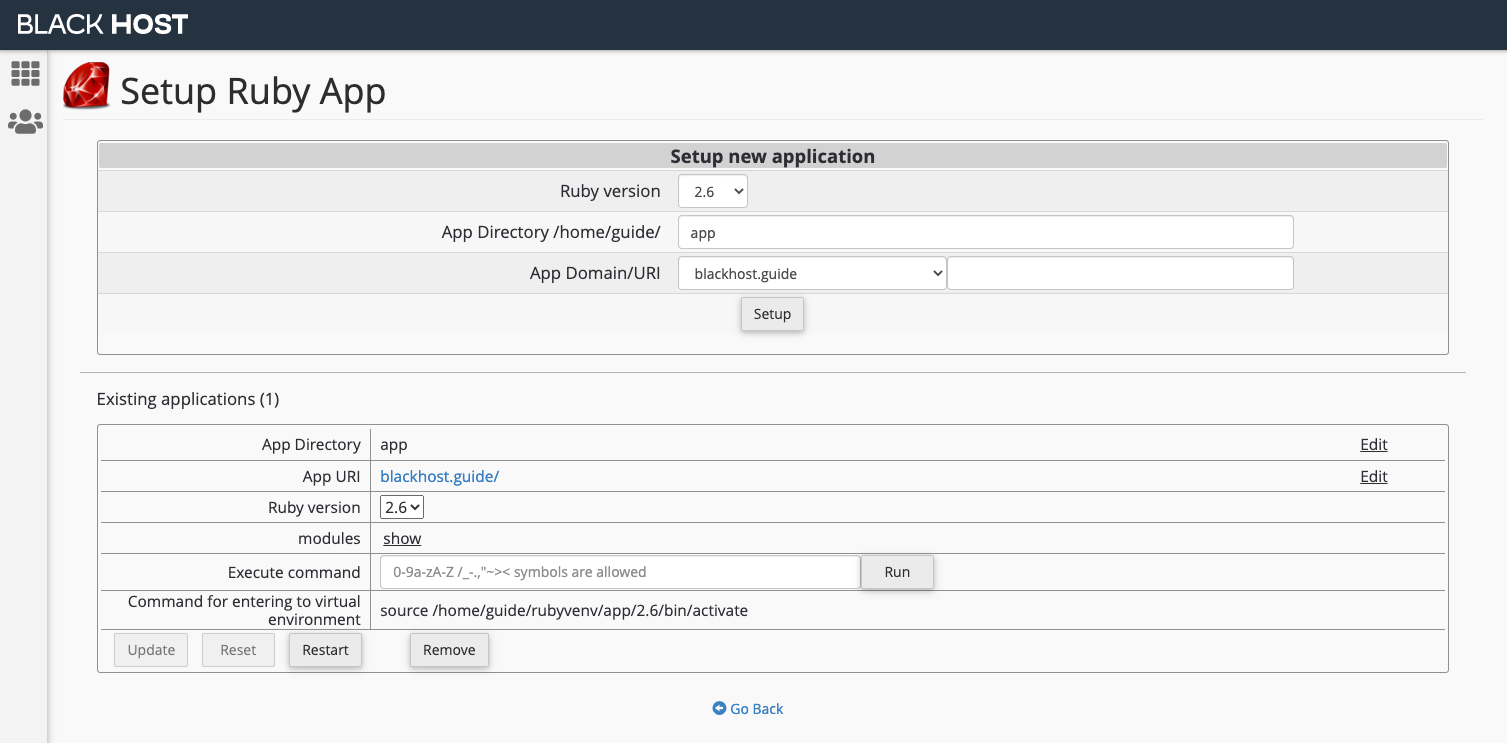
2. Choose the Ruby version you prefer, write the location where you want your app directory to be, press on setup, and voila!

3. Your app is configured and ready for you to upload your code. Once you upload your code, don’t forget to update or restart the Ruby app in order for changes to take effect.

Congratulations, you’ve run your first RoR app on cPanel.
And that will be it for today’s blog post. In our knowledgebase, we have a more detailed guide on How to Run Ruby on Rails on cPanel, so you might take a look there as well.


